Image capture in LWC
In most cases, we may need to use media-level features such as a camera and microphone. Salesforce Supports user media capabilities to do that. We can utilize these features in Lightning Web Components.
We can utilize the Javascript Navigator feature in the Lightning Web Component to access the media features.
Step 1: Before going to start, please make sure that Lightning Web Security is enabled in the Org.
Go to Setup → Session Setting → Enable Lightning Web Security.
Step 2: Create a Lightning Web Component and give its name to accessCamera.
Step 3 : To Use the navigator. mediaDevices methods to access the camera.
navigator.mediaDevices.getUserMedia({video: true, audio: false})
Step 4: Use the below HTML code to embed the camera frame.
<template>

       <div class="camera-wrapper">

           <lightning-button label="Start Video"

              class="slds-m-left_xx-small" onclick={initCamera}>

           </lightning-button>


        <lightning-button label="Stop Video" class="slds-m-left_xx-small"

                             onclick={stopCamera}></lightning-button>

        <lightning-button label="Capture Image"

             class="slds-m-left_xx-small" onclick={captureImage}>

        </lightning-button>

    </div>

    <div class="slds-grid slds-gutters">

        <div class="slds-col">

            <video class="videoElement" autoplay></video>

            <canvas class="slds-hide canvas"></canvas>

        </div>

        <div class="slds-col">

            <img src="" class="slds-hide imageElement" alt="captured

                                                             image"/>

        </div>

    </div>

  </template>
Step 5: In the JS file, create more methods to initiate the camera and capture the image.
 import { LightningElement } from 'lwc';


   export default class AccessCamera extends LightningElement {

    videoElement;

    canvasElement;


    renderedCallback() {

        this.videoElement = this.template.querySelector('.videoElement');

        console.log('video element>>',this.videoElement);

        this.canvasElement = this.template.querySelector('.canvas');

    }


    async initCamera() {

        if (navigator.mediaDevices && navigator.mediaDevices) {

            try {

                this.videoElement.srcObject = await

      navigator.mediaDevices.getUserMedia({video: true, audio: false});

            } catch (error) {

                console.error('Error accessing camera: ',

                        JSON.stringify(error));

            }

        } else {

            console.error('getUserMedia is not supported in this

                                                         browser');

        }

    }


    async captureImage() {


        if(this.videoElement && this.videoElement.srcObject !== null) {

            this.canvasElement.height = this.videoElement.videoHeight;

            this.canvasElement.width = this.videoElement.videoWidth;

            const context = this.canvasElement.getContext('2d');

            context.drawImage(this.videoElement, 0, 0,

            this.canvasElement.width, this.canvasElement.height);

            const imageData = this.canvasElement.toDataURL('image/png');

            const imageElement =

                           this.template.querySelector('.imageElement');

            imageElement.setAttribute('src', imageData);

            imageElement.classList.add('slds-show');

            imageElement.classList.remove('slds-hide');

        }

    }


    async stopCamera(){

        const video = this.template.querySelector(".videoElement");

        video.srcObject.getTracks().forEach((track) => track.stop());

        video.srcObject = null;

        this.hideImageElement();

    }


    hideImageElement(){

        const imageElement = this.template.querySelector('.imageElement');

        imageElement.setAttribute('src', "");

        imageElement.classList.add('slds-hide');

        imageElement.classList.remove('slds-show');

    }

  }
Step 6: Give access to the Lightning tab on meta data file.
   <?xml version="1.0" encoding="UTF-8"?>
      <LightningComponentBundle
                  xmlns="http://soap.sforce.com/2006/04/metadata">
         <apiVersion>59.0</apiVersion>
         <isExposed>true</isExposed>
         <targets>
           <target>lightning__RecordPage</target>
           <target>lightning__AppPage</target>
           <target>lightning__HomePage</target>
           <target>lightning__Tab</target>
         </targets>
     </LightningComponentBundle>
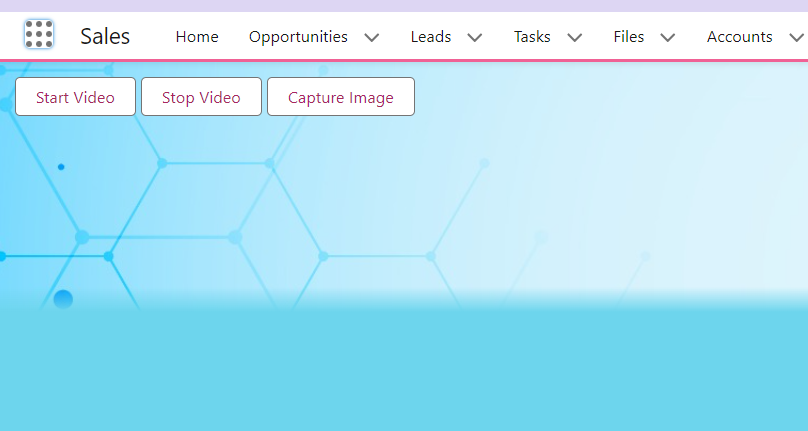
Step 7: Go to setup → Tabs and create a custom tab for the Lightning web component we created.
Step 8: Once you create the tab, open the tab and test the camera access from the component.
